Total Pageviews

Search This Blog

Sunday, February 28, 2016

HotT Undead Halloween Army


For this year's Halloween in April HotT meet, I wanted to paint an original army, but also wanted something very simple that would not require a lot of time - hence the green or gray color scheme with a few diluted washes or dry brushed colors added for accent work.  Here the dead rise from the ground in the stronghold of the necromancer.


A pair of ghostly fliers hovering over the battlefield, their passage gathering the mists below creating a chill cloud upon which they appear to float.


Werewolves have been recruited by the necromancer for their strength and viciousness and may be the only living servants able to tolerate the presence of the necromancer. 


The hero leader of the undead horde mounts a small mist covered rise to view his army on the march.  The mist was made using polyfill, which was glued and then sprayed to help hold it in place.  The polyphil works reasonably well as a representation of mist, though when enlarged in the photographs the individual fibers become more apparent and it looses some of the effect.  On the battlefield at 15mm size it works fairly well.


The headless horseman.  His substitute pumpkin head was sculpted from green stuff.  The figure is from Splintered Light - minus his head.


The necromancer himself with a flaming sword and two of his ghastly minions.


The Barker Marker.
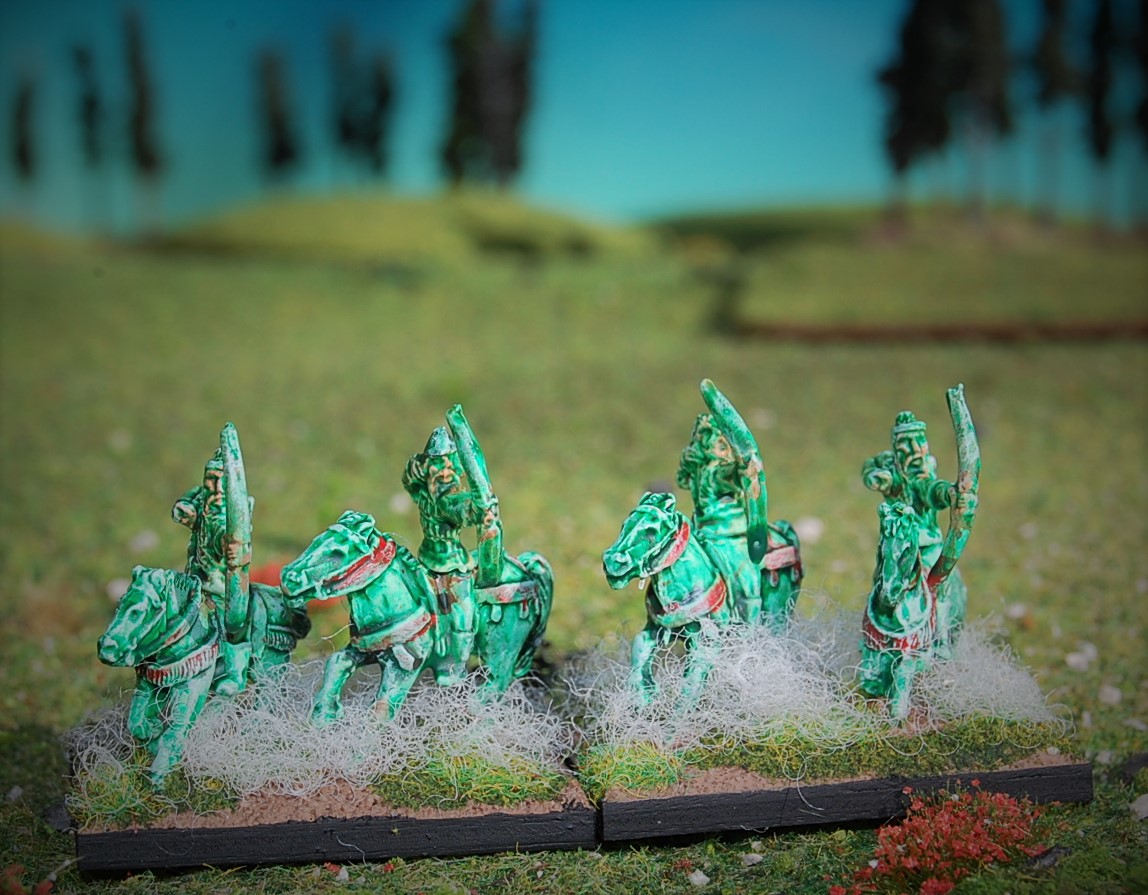

Knights and riders of the ghostly horde.  The bulk of the army is made from Baueda's Emishi line (proto-samurai).  As much as I love Baueda and some of their later figure lines, the Emishi were just butt-ugly.  I knew I was never going to take the time to actually paint them, so using them in this manner actually allowed me to not just melt them down for fishing weights.


The shooters


The spearmen are actually made from archers.  Many of the archer poses in this line were so awful, I decided to simply cut down the bow arm and disguise the surgery under a shield.  The spears were then placed in the right arm which was bent in the position of drawing a bow in most cases.  To disguise the transition from arrow hand to spear, I sculpted some rudimentary hands with liquid green stuff over the spear shaft so that it would appear less like the spears were floating on their bodies.  Not perfectly executed by any means, but for a super quick army presented in mass it works.


The ghastly army arrayed for battle.

Kings of War Undead


Skeleton archers made from a mix of Mantic skeletons, and mostly Wargames Factory skeletons.  The WF skeletons are delicate little guys, but I love the look.  I have mounted them on bases 3 or 4 to a stand so that the majority could be taken off the movement stand and used for Hordes of the Things.


Another unit of skeleton archers.


The movement bases are made from thin plywood with a balsa wood lip around the edge.


A regiment of skeletons.  I made the movement trays to hold a troop, so that I can field these as two troops or a regiment depending on my need.


A battery of balefire catapults.  I painted these, as well as the rest of the units, already mounted to their bases using mostly thinned washes of color to speed the process.


A regiment of wraiths in their baleful green.  These were fun and obviously very easy to paint.

10mm ACW Union Army - the Beginning


The genesis for this project started as a lot of my projects do, with a bargain at a flea market.  I got a bunch of GHQ 10mm ACW figures for $5 - I won't say how much that initial investment has blossomed, but I will say that the plank Road and Cracker line 10mm lines are wonderful!


I am basing these for a DBA variant called appropriately DBACW.  The supply wagon and artillery train elements serve as either base camps or forward supply depots.


Even corp commanders have to use the privy just like everyone else.


Each artillery piece comes with a choice of barrels.  So far I have stuck to bronze howitzers primarily, but need to learn a bit more about civil war artillery to give a better representation of all of the arms used.


The firing line - I painted these figures on the base which helped speed things along.  Union troops having a somewhat unified look made this an easy approach.  I hope I don't regret it when it comes to painting the confederates!

Bolt Action Stg III


My air compressor is out of commission so I have been enjoying a low tech approach to painting tanks and have come to the conclusion that I can actually do a more skillful job with a brush, than I can with a spray nozzle.  I've always loved the look of the sturmgeschutz, so this was a fun model to paint.


The mud splatter is what happens when your thumb and a toothbrush dipped in paint collide.  It's a little unpredictable, but can yield nice results.  Probably should have dirtied up the wheels a bit more, but maybe the crew just washed them to keep the tracks running smoothly.


The stowage on the back is actually a bunch of wooden crates from the 20mm FAA line, along with some jerry cans, drive wheels and a camouflage net folded up and glued in place.  It was a Pegasus product I believe, but essentially nothing more than died cheesecloth.

Sunday, September 20, 2015

Building a Light Weight 4'x4' Foldable Wargaming Board

Now that a larger board is desirable for DBA 3.0, I decided to retire my 3' boards and go for 4'x4'. To make it small enough to fit in the car I have hinged together two 2'x4' boards. The boards themselves are made of pink insulation foam board for light weight. The hinges and edges are made from black gorilla brand duct tape. The board was then painted, sprayed with adhesive and flocked. I'll do a protective over spray once I am satisfied with the flocking.


Now a 50/50 mix of white glue and water was applied to secure flowers, shrubs, rocks and larger details that might otherwise rub off. Looks pretty ugly until it dries. The initial application of flock was not very smooth, so rather than fight it, I decided to vary the flock and ground materials.


The finished board. In the first shot you can see how the thick 50/50 glue mixture mashed down the flock and darkened it. It looks a little funky in this picture in bright sun, but actually on a table and lying flat in a room the effect is quite appealing. After this thick white glue mixture was applied, the whole board was sprayed with a much more dilute white glue and water mixture.


My only concern at this point is that the shrubs and rocks will be to rough a surface for elements to lay flat.  The rocks and bushes are pretty well spread out so I suspect will not be a big deal, but I'll report back after the first game.  Now I just have to make another one so I can get out my triple sized Big Mac Attack and the Persians to put on a big battle DBA game.


Thursday, September 17, 2015

Mindstalkers 40mm Italian medieval fantasy figures


These figures are from the 40mm Mindstalkers game that came and went a few years back.  I picked up the figures on eBay for a song, so bought a boatload of them.  Many are still available I think from 99 cents to about $2.50 for a 40mm mounted knight.  I've been working on them off and on with the intention of playing Melee or In the Labyrinth with them.  Just thought I would post some pictures.  They are a little fiddly to put together, but really excellent sculpts.