The battle was staged in the United States, with players hailing from Scotland, England and New Zealand. Players received "bird's eye" photos from their commanders perspective and submitted orders via email. Many thanks to Stryker, who provided his home grown set of old school rules called Muskets and Marshals, which were slightly modified to accommodate the bigger battalions of the Tennant/Crenshaw collection. Typical battalions are composed of 24-36 figures, with skirmishers operating in detached groups of nine figures.
A period map showing the entire field of the campaign
The battle presented was part of the conflict to the north of Vimeiro on the rolling hills of the Portuguese landscape. The actual battlefield was scaled down so that the area of the model battlefield was equal to the section presented above - roughly 1.1x0.6 miles. Terrain features are roughly equivalent, though the farm of Ventosa is likely over-sized in comparison. The length of the deployed battalions is roughly equivalent to the scale, though as in most wargames, the depth of the formations is greater than the actual footprint would have been due to the size of the figures themselves.
French OOB
Units engaged are not accurately
represented as I was restricted to those available in the collection at
the time of the battle. The numbers engaged are relatively equivalent however.
Solignac's Brigade 2 battalions 69th Ligne (30 figures) 1 Battalion 6th Legere (30 Figures) 3 guns at Ventosa, 3 more on the way south east of Ventosa. 2 skirmish units of detached Voltigeurs
Brennier's Brigade 2 Battalions 39th Ligne (36 figures each) 2 Battalions 6th Legere (36 figures each) 1 Regiment Dragoons (18 figures) May detach Voltigeurs from three of the four battalions to make up to two skirmish units.
British and Portuguese OOB
Units engaged are not accurately represented as I was restricted to those available in the collection at the time of the battle. The numbers engaged are relatively equivalent however.
Divisional Command - Miles Nightingall
Forward Brigade:
Brigade Command - Alexander Howard
3 Battalions: 1/92, 1/71, 2/58
2 detached skirmisher units
Reserve Brigades
Brigade Command - Lt. Colonel Lord Blantyre (Nightingall's ADC has taken
over command of the 88th, releasing Lord Blantyre for command of the reserve brigades)
4 Battalions: 1/50, 2/42, 1/88, 2/24
Artillery reserve – Battery of Royal Artillery (foot) 5-9pdrs and 1 howitzer
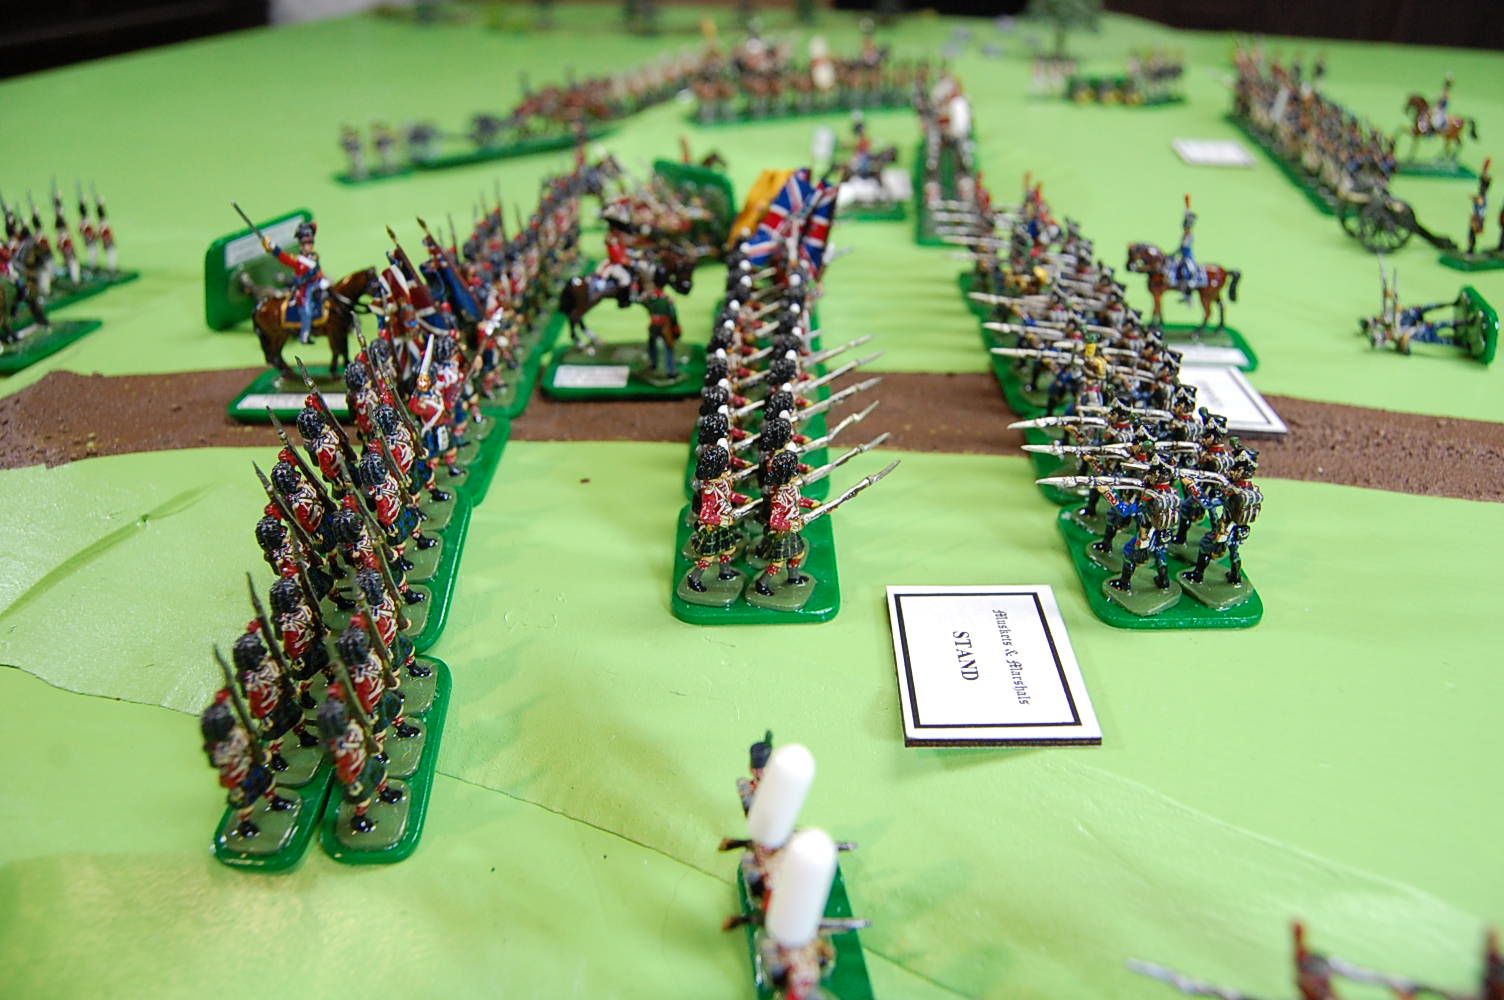
Ready for the troops
The initial engagement of the battle found three battalions of French under General Solignac, surprised by 3 brigades of British deployed for battle.
One of the first casualties of the game; Lieutenant Col. Cameron goes down with a direct hit from a French canon ball. General Howard would take over command of the Gordons, but he too would be wounded later in the battle and carried from the field having received a gun shot wound in the arm.
British Advance
Artillery and reserve battalions swing to the French right flank.
British charge the French line despite heavy fire.
2/58th struggle to advance
First French line begins to crumble.
1/71st Highlanders give the French 1/69th the bayonet and decimate them.
2/6th Legere flee the field as the Gordons show good order and attempt to reorganize after melee.
General Brennier arrives with his brigade and cavalry - but is it in time?
The 88th form square and the French Dragoons, after loosing their Colonel, think better of it and reposition toward the center of the battlefield.
The British line reorganizes as Brennier's columns approach.
A massive firefight ensues.
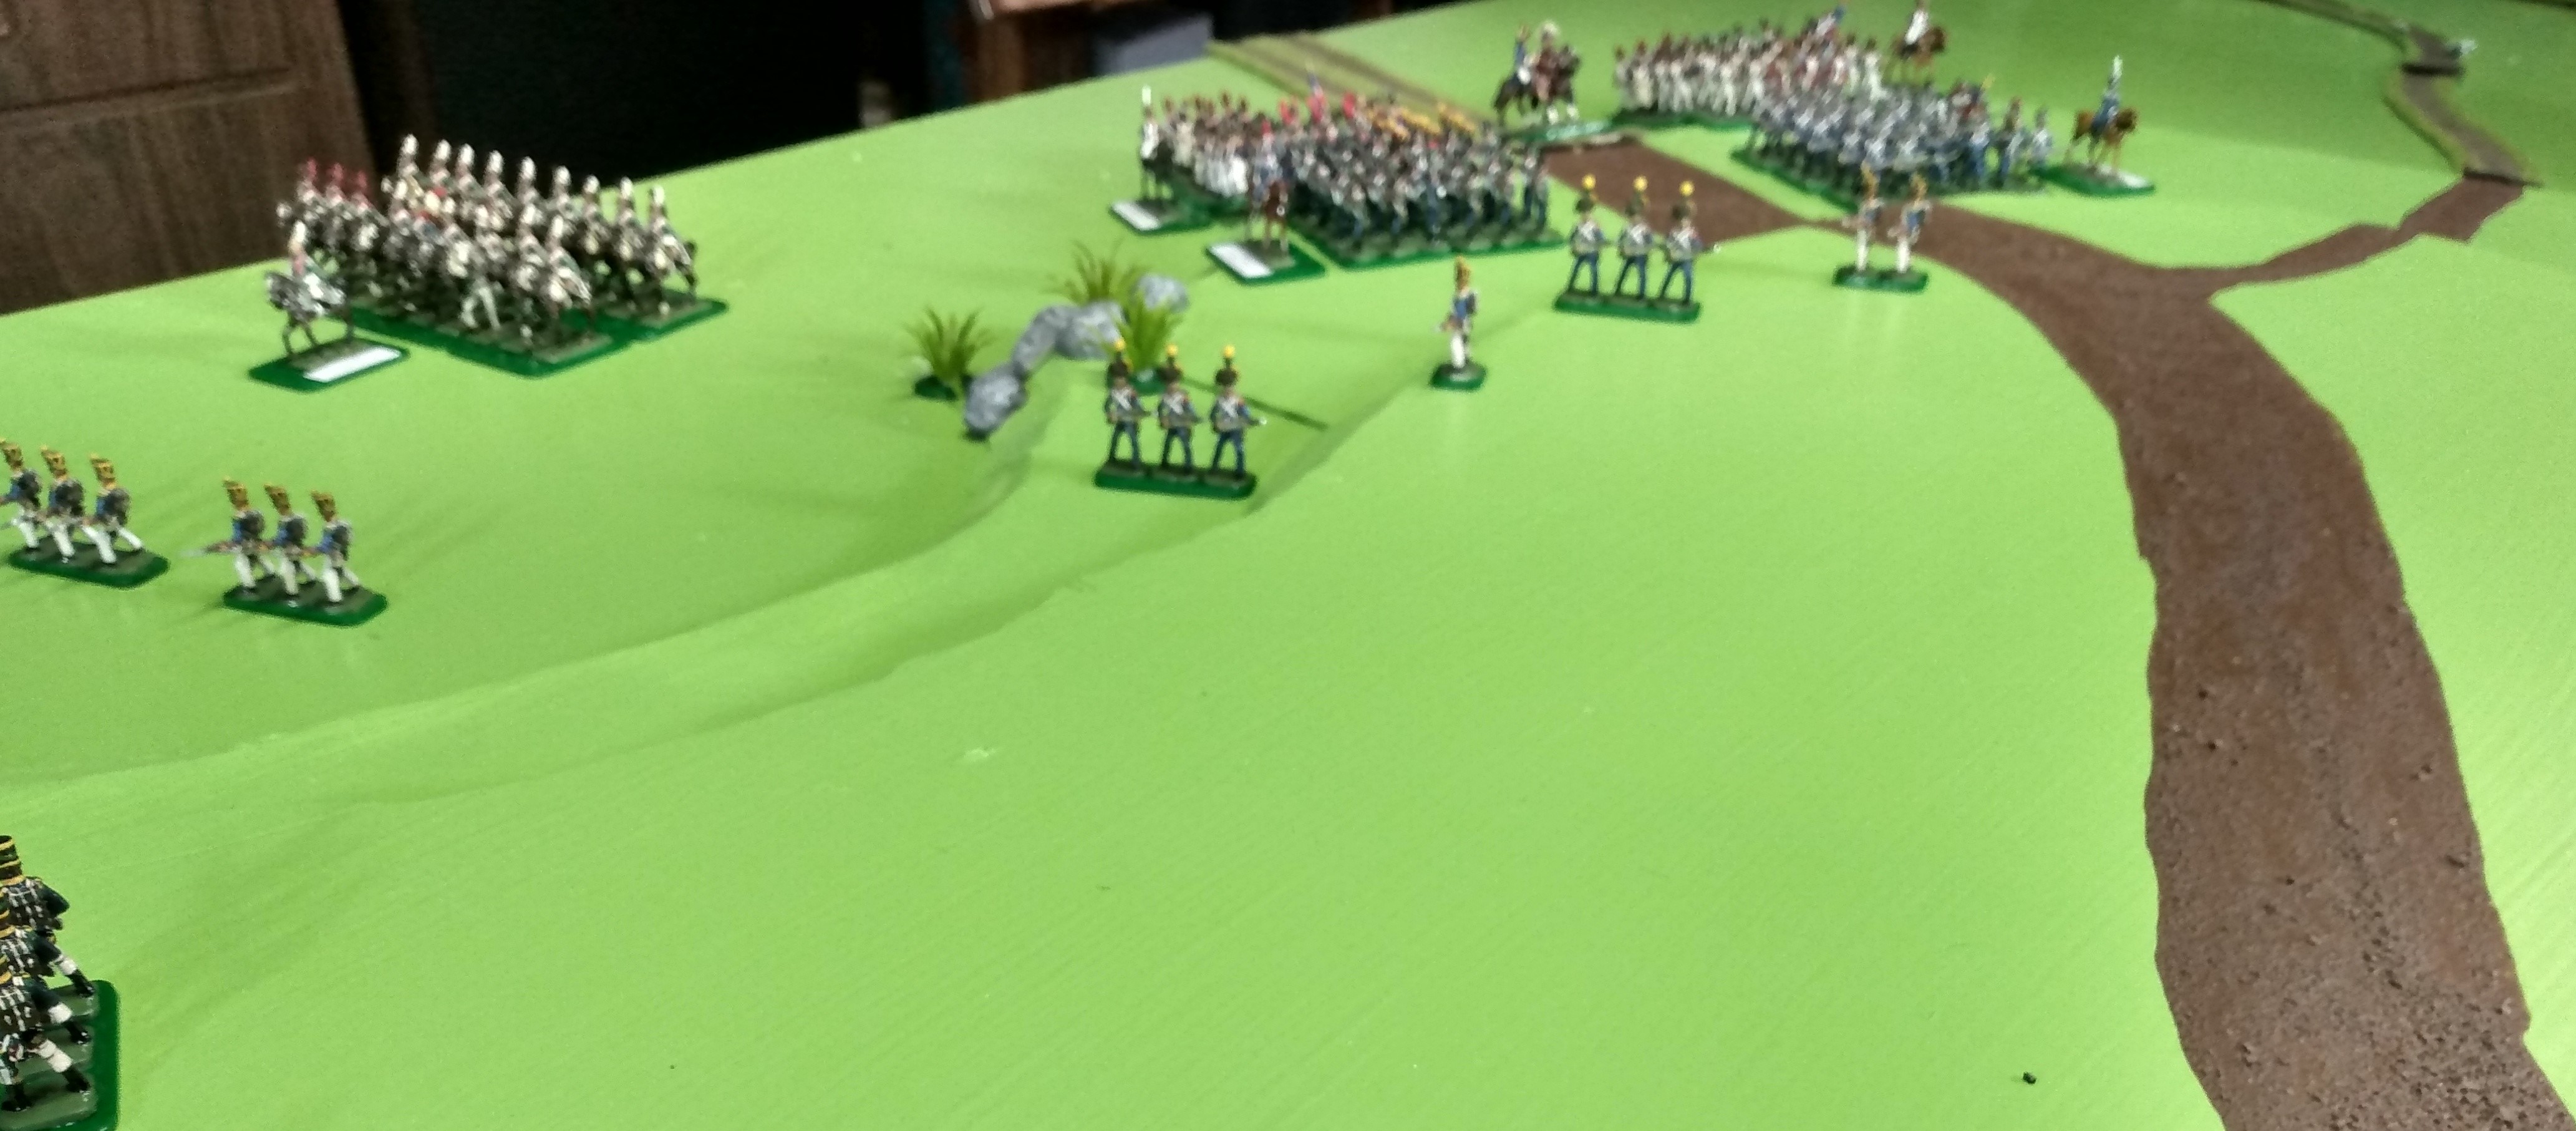
The French view from the 3/6th in the middle of the field toward Ventosa.
The French 3/6 Legere looking directly ahead. The British battery to their right was able to hurl canister into the French line, yet they stubbornly returned fire.
General Solignac tries to rally the shattered remnants of the 69th.
The dragoons charge through the tree line near Ventosa, hoping to catch the Black Watch unaware.
The highlanders are just able to form square, and suddenly it is the dragoons who find themselves in a world of trouble and are repulsed with heavy casualties.
The British Highland battalions of the Black Watch and Gordons have taken heavy casualties, but the French column is shaken by their fire and the loss of the 3/6 as it starts to come apart on their flank, stalling the French attack.
The 88th on the British left flank remorselessly closing in on the remnants of the French attack.
Trant arrives with the Portuguese directly behind the French!
The only hope for the French is now escape via the road south of Ventosa. The 1/6th Legere presses forward against the 1/71st Highlanders blocking the way, pouring a desperate fire upon them.
Carnage in the center.
The pincers close in on the French
The 1/6th punches a hole in the British defenses as the 71st flee from the French fire, creating an avenue of escape.
The French battalions in the center break and run to escape the trap, with the British in good order just behind them.
After holding the British Right flank for the entire battle, the 71st rout to the rear - the French fire was just too much and less than half of the battalion escapes.
The 2/39th is captured to the man.
The Portuguese and Black Watch chase the French from the field in disarray.
Conclusion
The battle progressed largely along historic lines, with aggressive British attacks chasing the French from the field. That being said, the British paid for the victory with very heavy casualties (especially among the high command) and at the end of the game (Turn 14 - just prior to the French fleeing the field) the score was only 5-3 in favor of the British (each army received one victory point for each battalion in good order). Thanks to Ian, Matthew, Rob and Aly for a great time that got me through two months of recovery from heart surgery. You guys are the best!
They came on in the same old style and we drove them off in the same old style! Actually we didn’t really as we were attacking but what the heck it was a great game - thanks for organising it.
That is one of the fun things about this scenario. Historically the British attacked the French for a change! They did give you what for as you came up the hill though.
We was robbed, I tell you (or should that be Dave'd?)! This was an absolutley splendid game to fight, and how marvellous to finally find out what was actually going on. I could see b*gger all for most of it.
Your troops and terrain are absolutely sensational. I'm particularly intrigued by the 6th Legere French battalions. You didn't happen to catch sight of the figure codes when you were remounting them, did you? I'm guessing that they're mostly French young guard voltigeur conversions. Whatever they are, they're beautiful.
You wus robbed! There were times that I really couldn't roll anything but 1s and 2s for the French it seemed! Nice to hear that the low perspective photos made for a different, and I hope enjoyable, experience.
The 6th really is a hodge podge of different codes, even including some Peter Gilder painted Alberkan Voltigeurs. The 3rd Battalion is described here: https://miniatureminions.blogspot.com/2019/08/6th-legere-deployed-and-amazing.html and here: https://miniatureminions.blogspot.com/2019/06/preparing-for-battle-muskets-and.html on the posts entitled: 6th Legere Deployed and an Amazing Serendipitous Find and Preparing for Battle - Muskets and Marshals. The codes are not usually specified but the figures are presented a little more clearly and I am sure an expert like you will have no problem figuring it out. :)
Great fun, but next time I could do with not having a brigade of those d*mn 'rosbifs' and 'skirts' all up in my face right from the very start? Solignac
That did seem a bit unfair. :) You softened them up nicely though, so Brennier was able to send the kilted ones packing to the rear by the end of the game at least.
A splendid game indeed David… Thank you for putting it all together. As Matthew says it was good to see the whole picture… The limited views we saw really gave a good sense of the fog of war… I think my cunning plan of shooting every Frenchman in sight worked reasonably well…although I would have preferred it if they had had the decency to not shoot back 😁.
Very glad you enjoyed it Aly and that the fog of war shots were not too frustrating. Next up, Talavera! Actually, I still need to paint up two battalions of combined grenadiers for Vimeiro proper.


.jpg)


They came on in the same old style and we drove them off in the same old style! Actually we didn’t really as we were attacking but what the heck it was a great game - thanks for organising it.
ReplyDeleteThat is one of the fun things about this scenario. Historically the British attacked the French for a change! They did give you what for as you came up the hill though.
DeleteMarvellous! The only thing missing is Edward Woodward.
ReplyDeleteNot being British I am assuming that is some obscure Callan reference? I have never seen it unfortunately, but glad you enjoyed my version!
ReplyDeleteHere you go! https://youtu.be/1BlMkT6cXvk
DeleteNow that is Old School!
DeleteWe was robbed, I tell you (or should that be Dave'd?)! This was an absolutley splendid game to fight, and how marvellous to finally find out what was actually going on. I could see b*gger all for most of it.
ReplyDeleteYour troops and terrain are absolutely sensational. I'm particularly intrigued by the 6th Legere French battalions. You didn't happen to catch sight of the figure codes when you were remounting them, did you? I'm guessing that they're mostly French young guard voltigeur conversions. Whatever they are, they're beautiful.
Best regards, WM (aka General Brennier)
You wus robbed! There were times that I really couldn't roll anything but 1s and 2s for the French it seemed! Nice to hear that the low perspective photos made for a different, and I hope enjoyable, experience.
DeleteThe 6th really is a hodge podge of different codes, even including some Peter Gilder painted Alberkan Voltigeurs. The 3rd Battalion is described here: https://miniatureminions.blogspot.com/2019/08/6th-legere-deployed-and-amazing.html and here: https://miniatureminions.blogspot.com/2019/06/preparing-for-battle-muskets-and.html on the posts entitled: 6th Legere Deployed and an Amazing Serendipitous Find and Preparing for Battle - Muskets and Marshals. The codes are not usually specified but the figures are presented a little more clearly and I am sure an expert like you will have no problem figuring it out. :)
Great fun, but next time I could do with not having a brigade of those d*mn 'rosbifs' and 'skirts' all up in my face right from the very start?
ReplyDeleteSolignac
That did seem a bit unfair. :) You softened them up nicely though, so Brennier was able to send the kilted ones packing to the rear by the end of the game at least.
DeleteA splendid game indeed David… Thank you for putting it all together.
ReplyDeleteAs Matthew says it was good to see the whole picture…
The limited views we saw really gave a good sense of the fog of war…
I think my cunning plan of shooting every Frenchman in sight worked reasonably well…although I would have preferred it if they had had the decency to not shoot back 😁.
All the best. Aly (Blantyre)
Very glad you enjoyed it Aly and that the fog of war shots were not too frustrating. Next up, Talavera! Actually, I still need to paint up two battalions of combined grenadiers for Vimeiro proper.
DeleteBrilliant!
ReplyDeleteThanks Prufrock. Glad you enjoyed.
Delete