Vimiero 1808 is the largest engagement I have tried thus far using Muskets and Marshals, so before having a full crew over to play I wanted to get in a test game. To that end I had a couple of brave volunteers willing to brave the cool temps in my garage head over to test the game (Thanks to SD and JD for their enthusiasm and great ideas). Once again the rules performed very well with results that seemed historically based. I have been consistently pleased at how well this simple set of rules has performed. I did make a few tweaks to accommodate my big battalions and I wanted to make sure they did not adversely affect game play. Not wanting to give away the game entirely since there is another bigger game day planned, I'll just present a brief overview of the day's action.
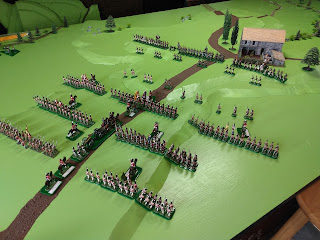 |
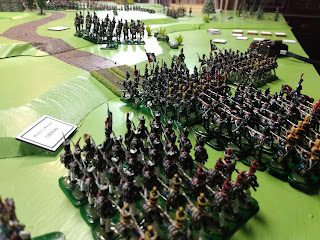
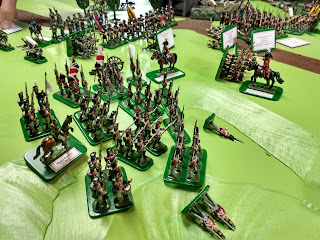
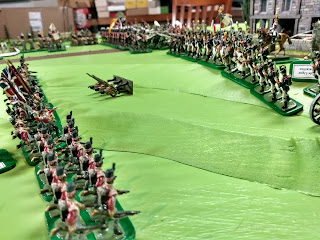
Starting positions as a French brigade faces off against three British brigades a few miles North of Vimiero.
|
 |
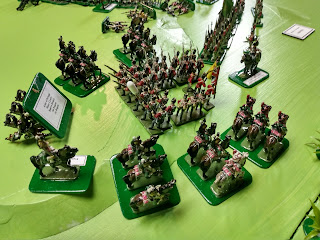
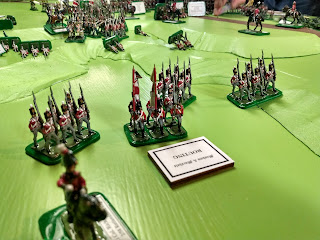
British assault up the hill.
|
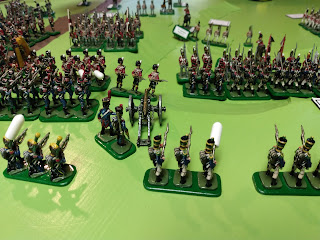 |
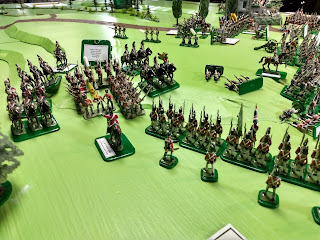
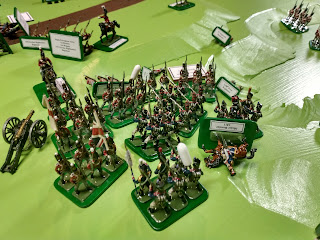
View from the French side as the battalions clash - Note the skirmishers have retreated behind the line.
|
 |
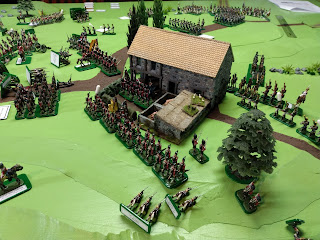
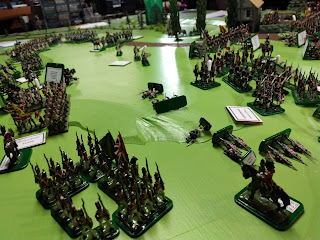
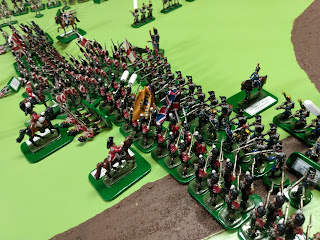
Intense fighting at the top of the hill.
|
 |
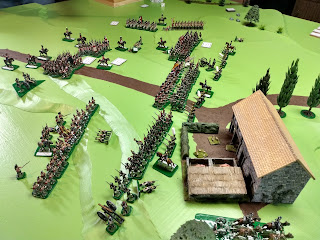
The British breakthrough in the center and their right has pushed back the French, but on the left of the line the French have mounted a stubborn defense, delaying the British advance.
|
 |
Brennier's brigade arrives in the nick of time - maybe too early - with a regiments of Dragoons in the lead.
|
 |
Lead elements of the British advance around their left flank, form square in the nick of time and the Dragoons flow around the square taking heavy casualties in the process.
|
 |
The next British regiment suddenly finds themselves unprepared for a cavalry assault and still in line.
|
 |
More bad news for the British - Colonel Macara of the Black Watch goes down!
|
 |
On the left of the British line the French refuse to give ground and send one British Regiment streaming to the rear just as a second engages them. Despite overwhelming odds the French hang on by the skin of their teeth!
|
 |
Oh the shame of it all!
|
 |
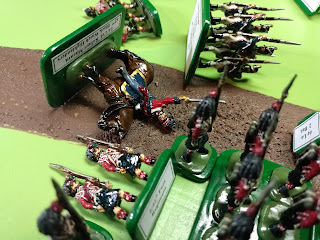
But what is this? Major Dornier of the French 69th is down!
|
 |
More good news for the British as their second flanking battalion form square just as the French Dragoons bug out due to British fire from the first square.
|
At this point it seemed like a good place to call it for the day, as the next phase of the battle was likely to take some time to resolve. The game was a great test of the rules and really helped identify a few questions I need to ask, and most importantly, how to calculate the victory conditions and the timing of reinforcements. Many thanks to SD and JD for their input and of course Stryker over on the Hinton Hunt Vintage Wargame Figures blog, for his development of the rules and willingness to share!
Beautiful indeed David…
ReplyDeleteIt’s so nice to see this played out… I just want to paint more shiny toys now😁.
All the best. Aly
Aha! Then my evil scheme has succeeded!
DeleteThe 42nd failing to form square in time - now where have I heard that before?
ReplyDeleteLooking good...
Actually the 42nd, despite the loss of Colonel Macara, comported themselves well and took possession on the Ventosa farm on the right flank. Was one of the few bright spots for the British...
DeleteSo the Red Hordes got a bit of a beating! I wonder how it will pan out.
ReplyDeleteYour troops and terrain look amazing, David, but then so they should given the extraordinary and meticulous work you put into them. How many soldiers were on the table? It look like zillions.
Best regards
WM
Thanks Matthew. While they did suffer on their left flank, the red Hordes as you so aptly described it was far from a spent force, and Trant's Portuguese are out there somewhere...
DeleteOn the table we had somewhere upwards of 500 figures with another hundred Portuguese piddling around lost on a track somewhere, but bound to show up eventually.
Now that is a spectacle. It looks like my entire ambitions when a I first started this hobby in one photoshoot!
ReplyDeleteAll that is missing is Donald Featherstone in the background directing the troops.
Matt, I'm sure he was there in Spirit. He had likely played with many of these very figures as they feature in many of the books he had a connection to!
Deletevery enjoyable - thank you.
ReplyDeleteHey Norm, glad you were able to pay the ole blog a visit and enjoyed it.
DeleteBest,
David
A great looking game David - glad the rules performed well!
ReplyDeleteThey really do, and everyone agreed they made for a fun game. I did have a couple of easy questions I think about March columns. I'll send them your way when I get a chance to take a closer look. Thanks again!
DeleteA terrific set up and a great looking game. I recently played Vimiero and it was a close run game which went to the wire and a French victory.
ReplyDeleteSeeing the pictures motivated me to get started on my next 6 Scots Greys.
It will be interesting to see how the full scenario plays out. I really believe the battle to the North could have swung the either way. Glad to know the Scots Greys will be charging again soon!
Delete